
How to make you your own electric bicycle lithium battery
How to make you your own electric bicycle lithium battery
A lithium battery pack is one of the most important parts of an electric bike.
Because of the lifetime of a lithium battery pack r the high cost, Some users may like to make their own. Here we would like to share our experience on how to make the ebike lithium battery.
Material and tools needed.
- 18650 lithium battery
- BMS (battery management system)
- Electric connector
- Short length wire
- Pure nickel strip
- Tin solder
- Non-static tape
- Green Shell Paper Insulation paper
- Foam padding (optional)
- Large diameter shrink wrap or tape (optional, sort of)
- Battery box ( optional)
Tools used
- Soldering iron
- Spot welder
- Scissors
- Hot glue gun
- Digital voltmeter
- Hair dryer (if using heat shrink tube)
- Work gloves or latex gloves
18650 lithium battery cells

18650 lithium battery cells are widely used in laptops, power bank, RC Toys, Drones, flashlight, e-cigarette, portable instruments, e-bikes, e-cars etc. Most electric bikes would use the 18650 lithium battery as the power at present.
There are many different types of 18650 lithium battery cells for choice, branded battery such as Samsung, Panasonic, Sony, LG etc.
Kindly remind!
When choosing the 18650 battery cells please keep in mind that, all the battery cells are brand, the voltage difference of each cell should be smaller than 0.05V, the Internal resistance difference should be smaller than 5 mΩ, the capacity difference should be smaller than 30mAh. Generally, for the new battery cells, the supplier would have tested and ensured all the cells are assembled well.
Battery Management System- BMS

About the basic knowledge about BMS please refer to: What is the electric bike lithium battery BMS
Short-length wire


Pure nickel strip
There are two types of nickel strips available in the market: nickel-plated steel strips and pure nickel strips. The pure nickel is suggested as it has a much lower resistance, which has less heat generation during the charging and discharging, that leads to a longer battery life.

Now let us start!
Step 1 Confirm the voltage and capacity of the battery pack, and the battery shape and installing position. The voltage of the battery should match the controller and motor of your e-bike, or it would be a fault.
Step 2 Design your battery cells assembly, arrangement, and connection.
For assembly in serious or parallel, please refer to Electric bike lithium battery 18650 battery types and assembly
Step 3 Assemble the 18650 battery cells
According to the design, you can assemble the cells to make the pack by using hot glue or by using plastic 18650 battery holder.
For example, if you want to get a 36V 8.7Ah lithium battery pack, each battery cell is 3.6V 2900mAh, you need 3 battery cells in parallel and 10 parallel groups in series (10S), totally 3*10= 30 battery cells.

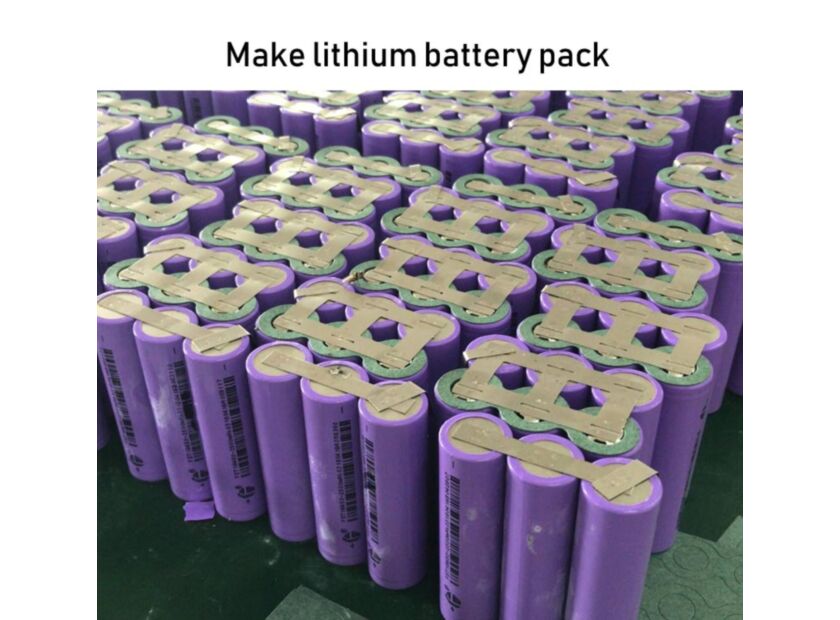
Step 4 Connect the 18650 battery cells with the nickel strips by using the Spot Welder

First, check the spot welder to confirm the two welding needles are on the same level. If the needles are oxidized or blackened, you need to polish them to the surface smooth with a sandpaper.
Lay the nickel strip on top of the 3 cells ( parallel ), ensuring that it covers all cells terminals leave 10mm excess strips for connecting it to the BMS and then cut it. You have to adjust the welder pulse and current knob according to the thickness of the nickel strips. Make sure the welding pen is compressed with the nickel strip and battery terminal, then press the foot switch. You will notice a small spark and two dot mark on the strip. Each battery cell nope-positive or negative could be welded twice that you will see 4 different dots.
After welded, you can check the weld quality by pulling on the nickel strip. If it doesn’t come off with hand pressure or requires a lot of strength, then it’s a good weld. If you can easily peel it off, then you have to increase the current.
Complete welding the battery cells in parallel, 3 in parallel, 10 groups. Then welder each group in series.
Step 5 Connect the BMS

Measure the voltages of each parallel groups of battery cells, the voltages should be increased regularly from B1 to B10, if any voltage is outstanding, please check if any problem in this parallel group.
Connect the cable bus of the BMS to the battery from B1 to B10, seen from the picture, the GND( black color) connect to the negative nope of 1st parallel group, the B1 connects to the positive nope of the 1st parallel group, the B2 connects to the positive nope of 2nd parallel group, and so on.
Step 6 Wrap the battery pack with Green Shell Paper Insulation paper and Large diameter shrink wrap.
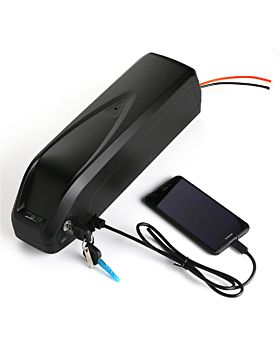
Step 7 Connect the electric connector for the charging input and the power output, and have a test.


Sign In
Create New Account